How to Set Up and Install the Plugin
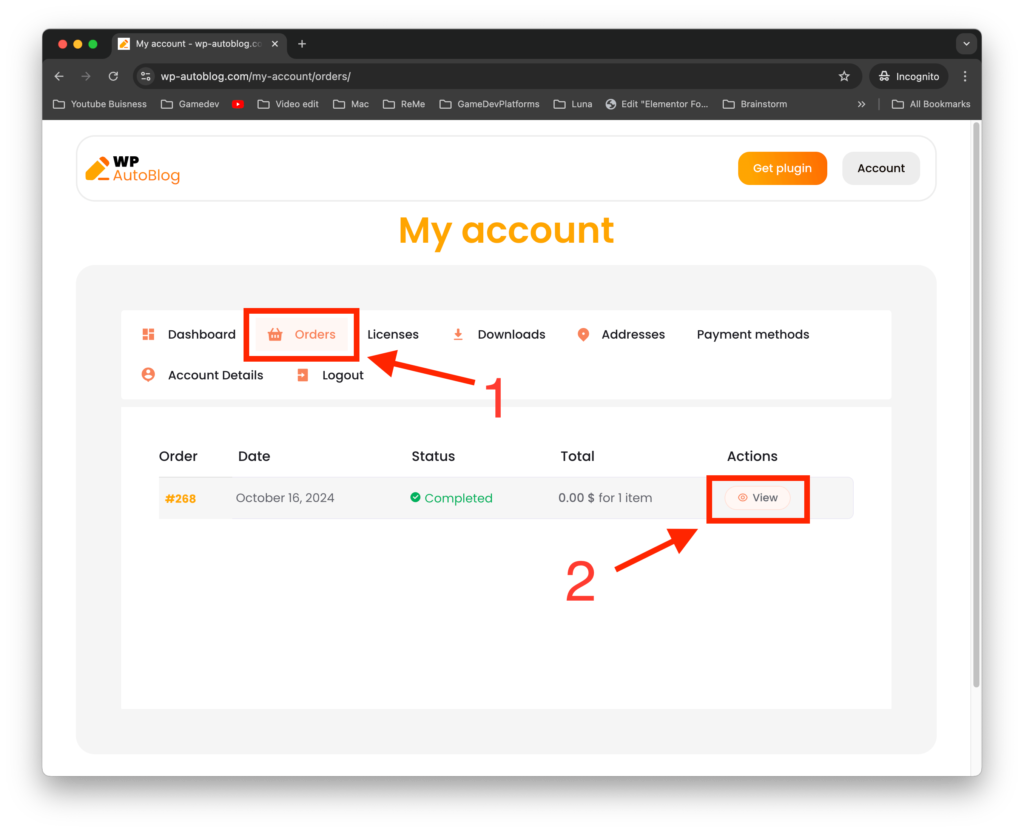
Access Your Account Page
After purchasing the plugin, head over to your account page to begin the setup.
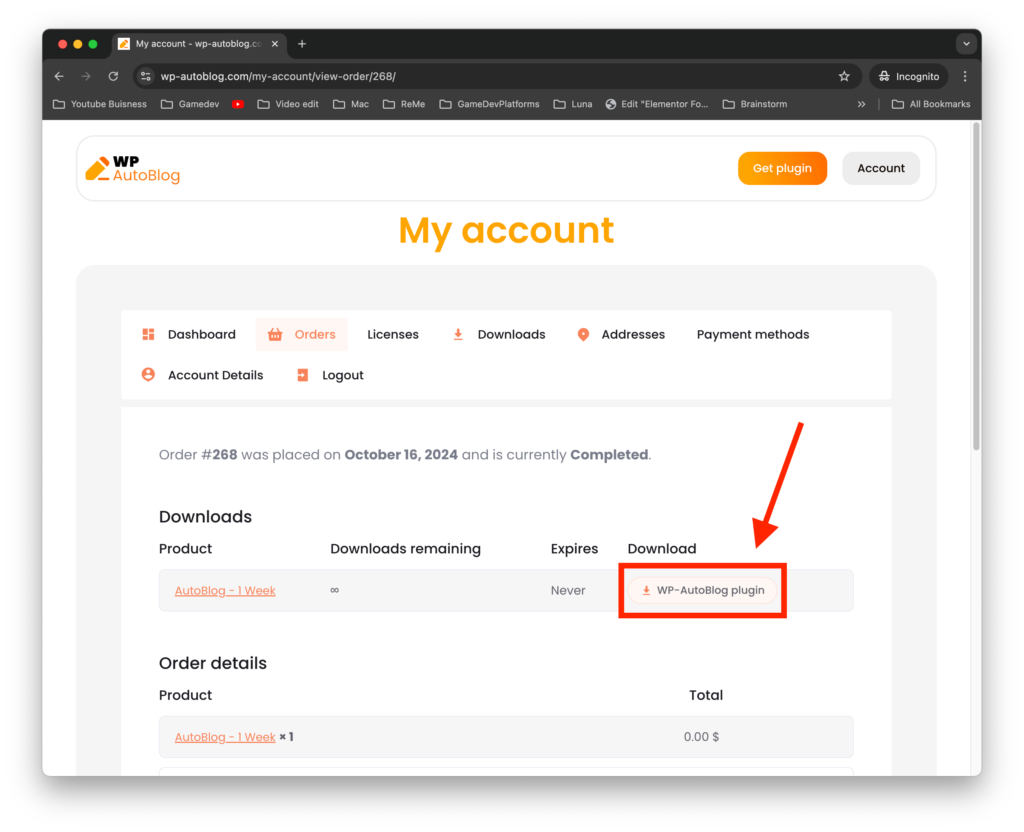
Download the Plugin File
Navigate to the ‘Orders’ section on your account page to download the plugin file.
Upload the Plugin to WordPress
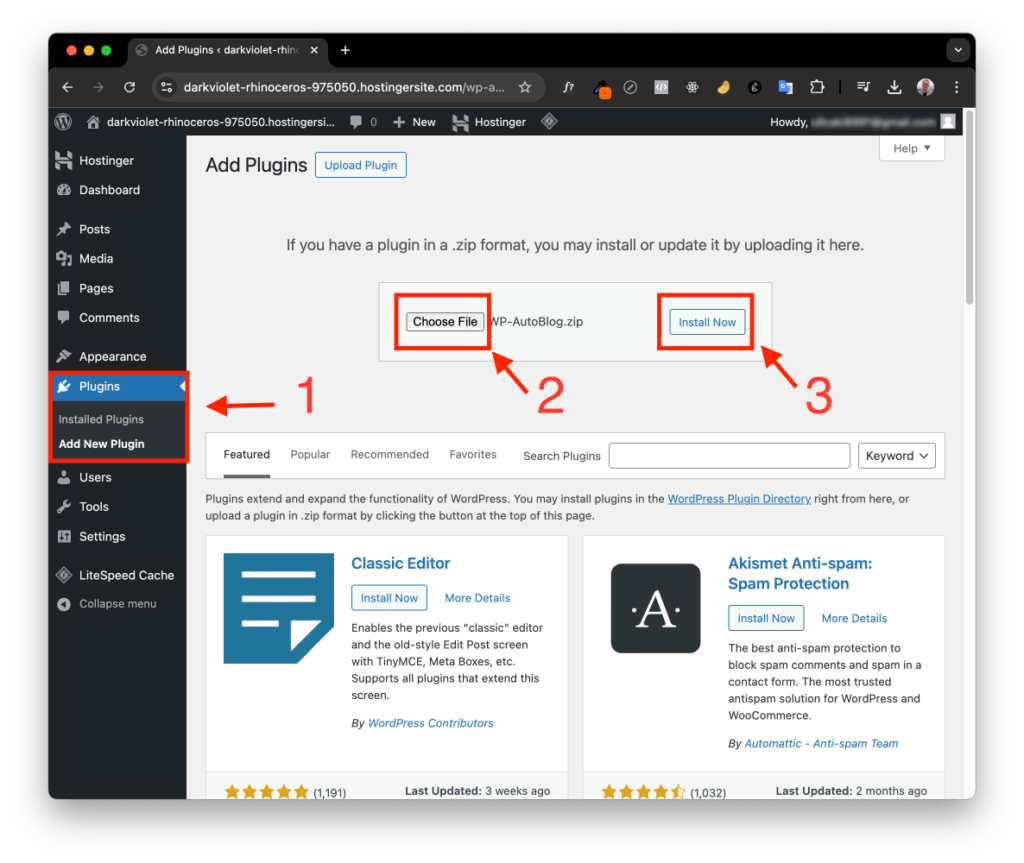
Go to your WordPress dashboard, select Plugins > Add New, then click Upload Plugin.
Install the Plugin
Upload the downloaded file, and click Install Now to install the plugin.
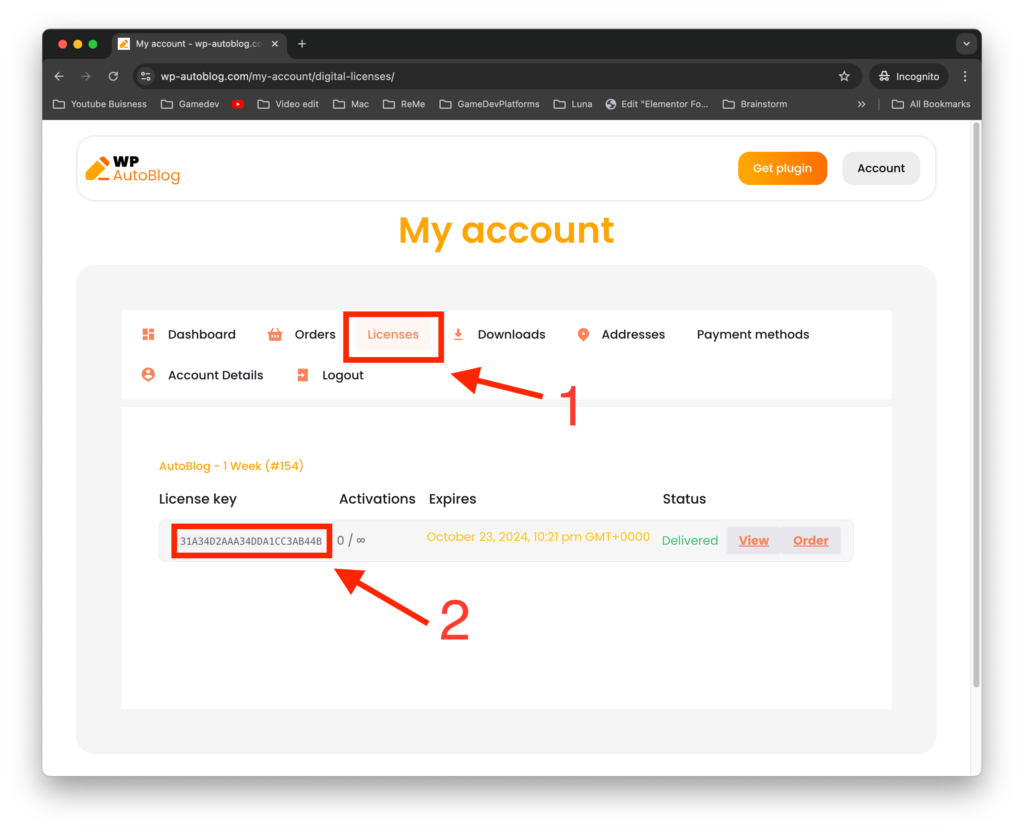
Copy the License Code
Return to your account page on our website to copy your license code. You’ll need this to activate the plugin.
Activate the Plugin
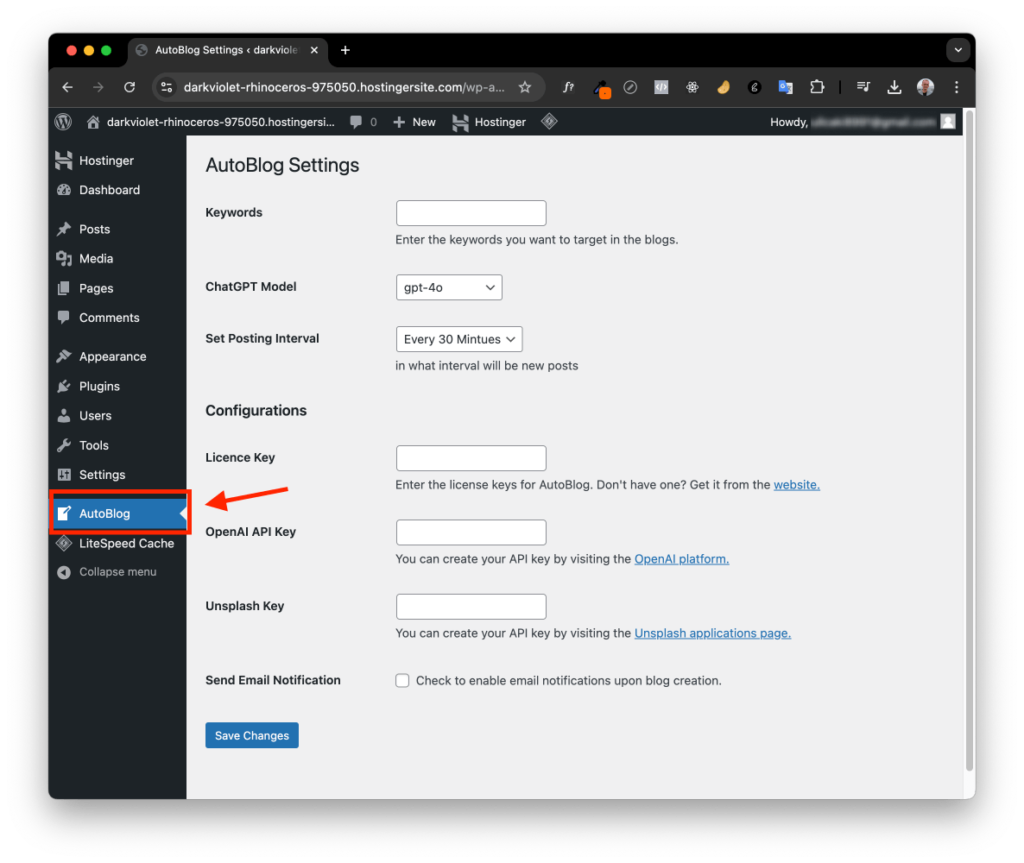
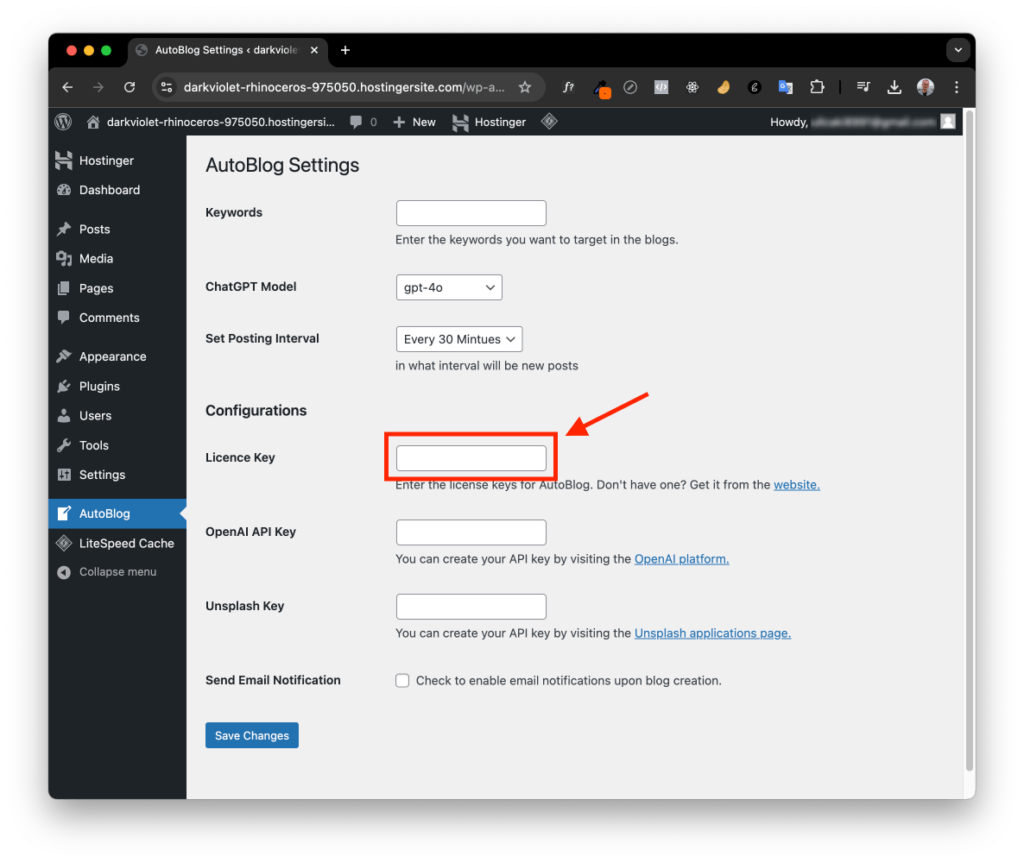
Head back to your website’s plugin settings, paste the license code into the required field, and save.
Setting Up Your OpenAI API Key
Create Your OpenAI API Key
If you don’t have an OpenAI account, create one here.
Generate an API Key
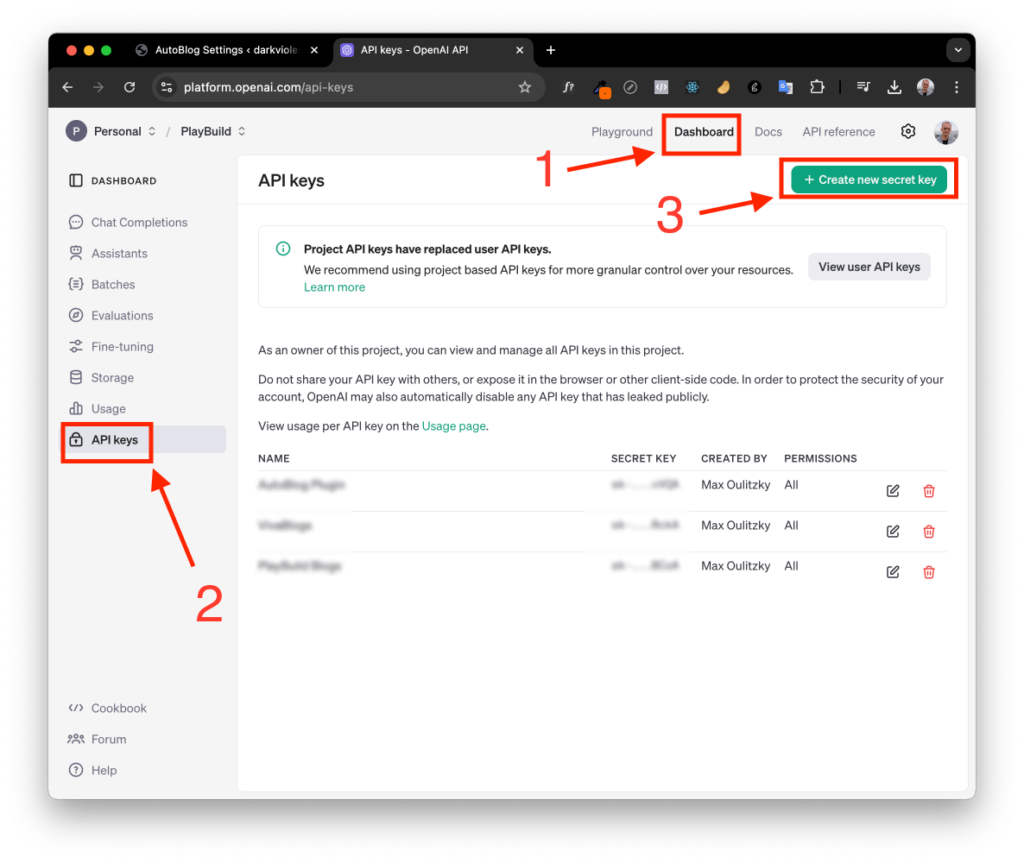
Once logged into OpenAI, go to the Dashboard, navigate to API Keys, and click Create New Secret Key to generate your key.
Copy the Key
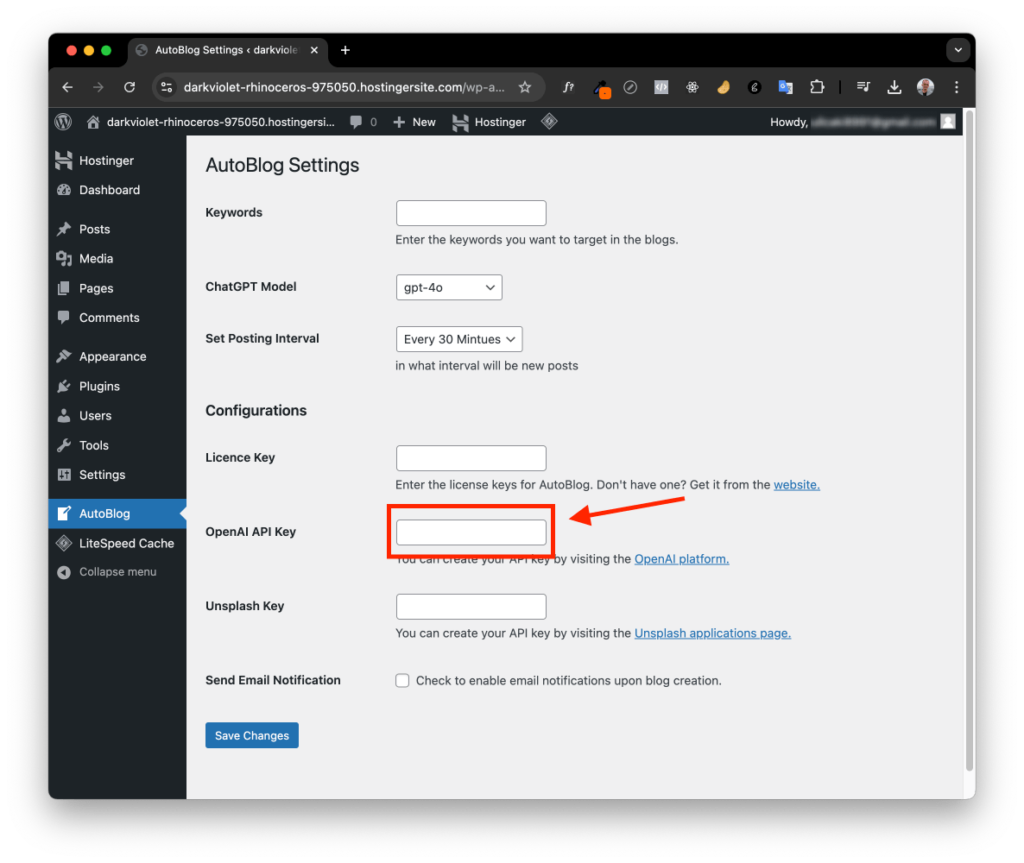
Copy the secret API key and paste it into the plugin settings under the OpenAI API Key field.
Setting Up Your Unsplash API Key
Create an Unsplash Account
Visit Unsplash and create an account if you don’t already have one.
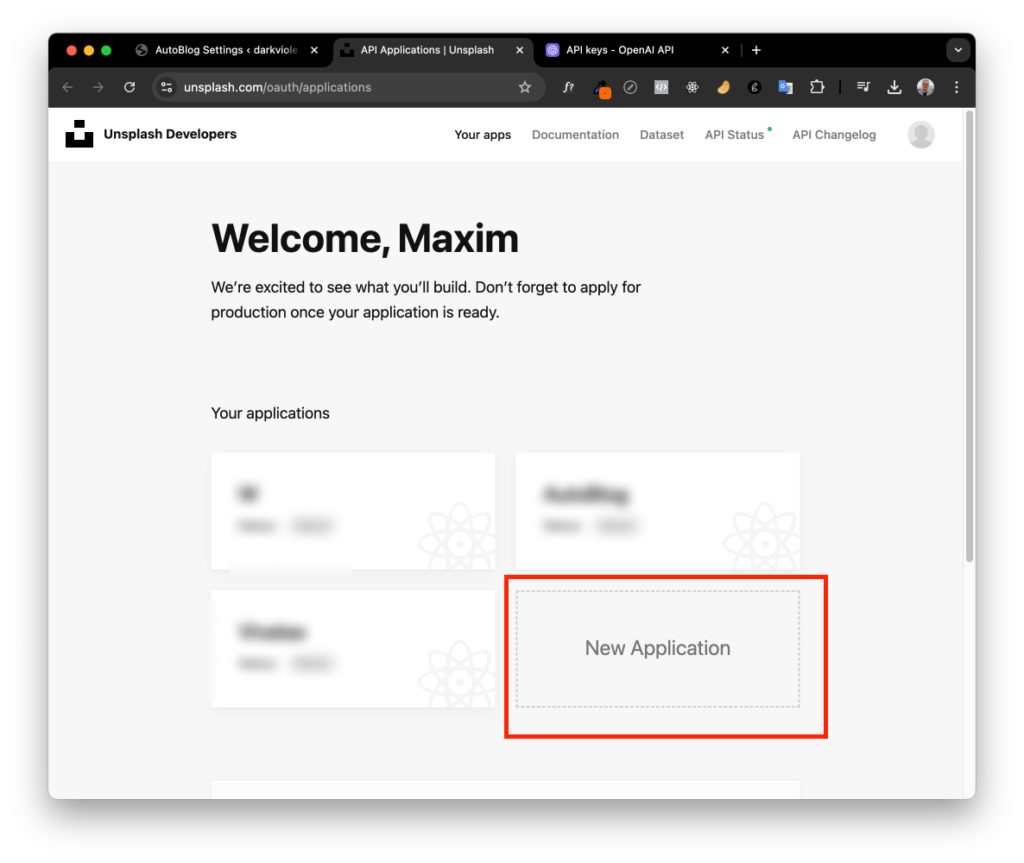
Create a New Application
In the Unsplash developer dashboard, create a new application to obtain your API credentials.
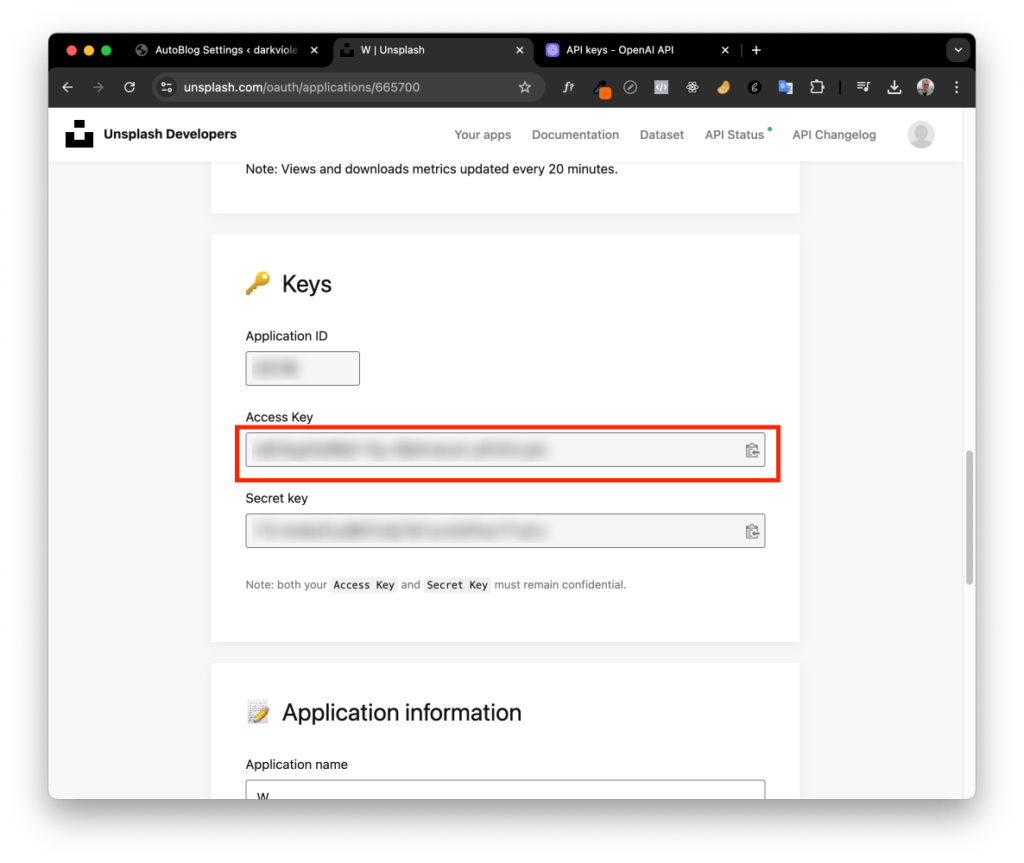
Copy the Access Key
Scroll to the bottom of the application page to find your Access Key, then copy it.
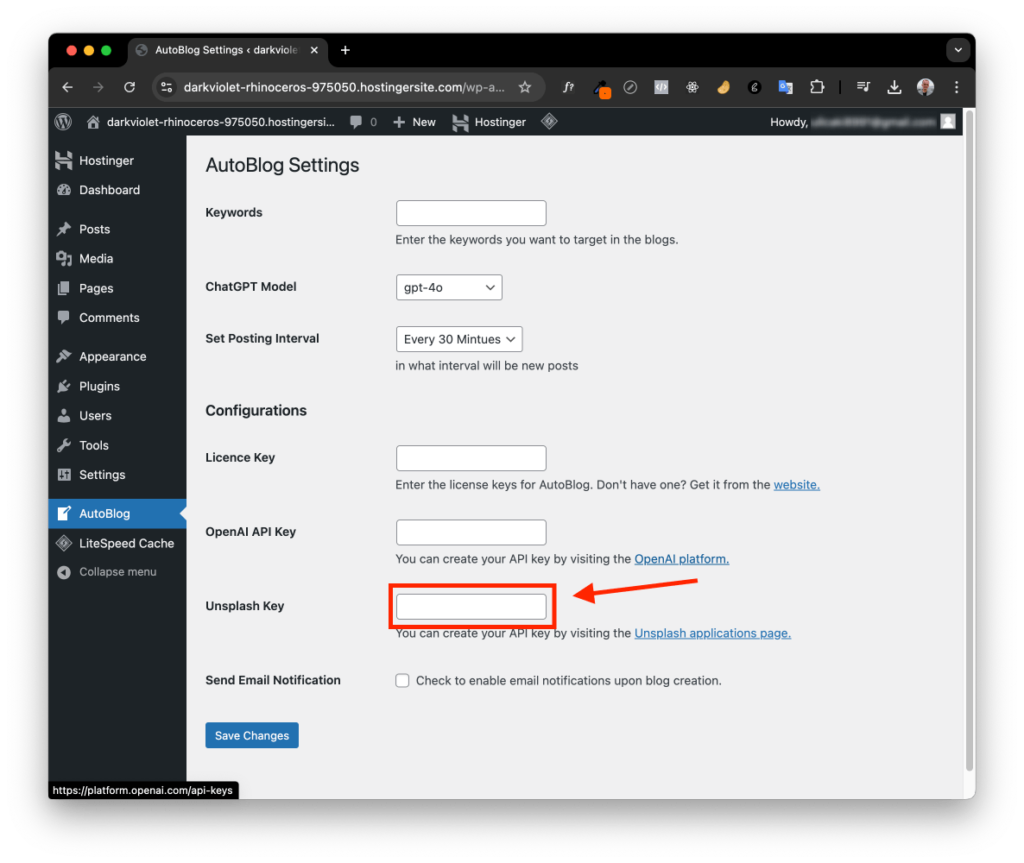
Add the Access Key to the Plugin
Go back to your WordPress plugin settings and paste the Unsplash Access Key into the relevant field.
Final Steps: Configure Keywords & Settings
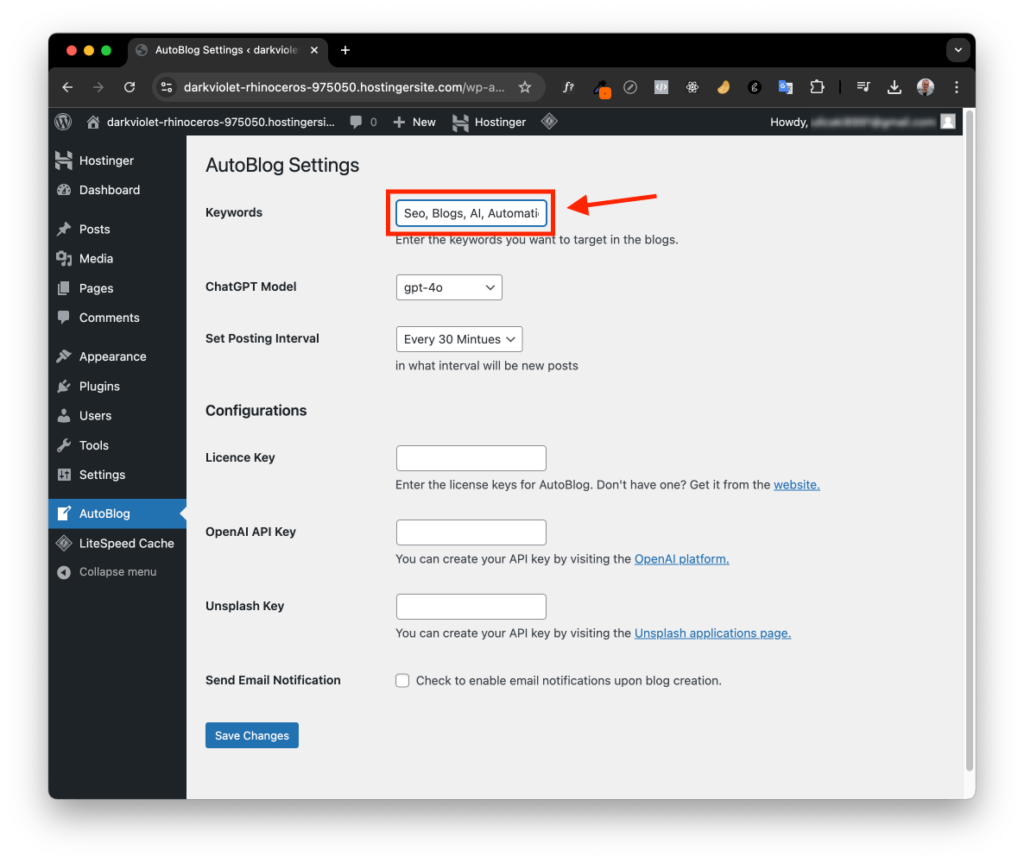
Enter Target Keywords
In the plugin settings, enter the keywords you want to target in your auto-generated blog posts.
Set the Post Interval
Choose how often you want the plugin to create and publish new blog posts (e.g., daily, weekly, etc.).
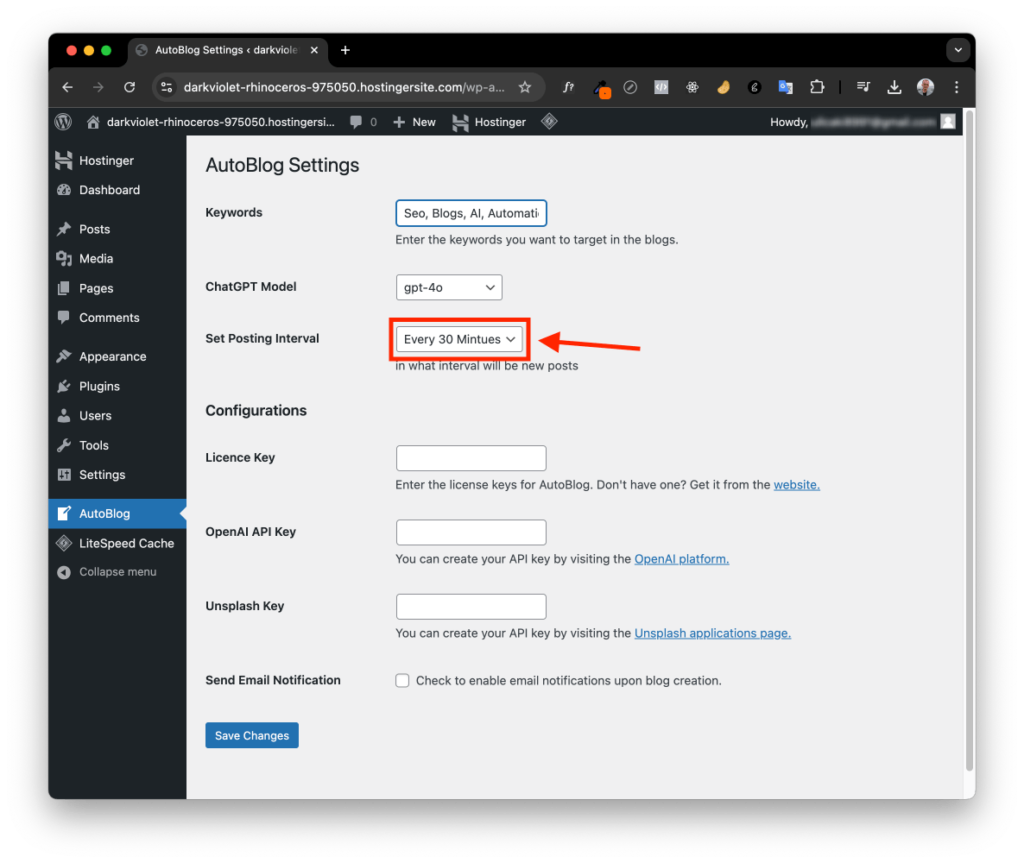
Set the Post Interval
Once everything is set, click Save. That’s it! You’re all set to auto-generate SEO-optimized blog posts with targeted keywords and stunning stock images.